 Let us use web development tools hosted on the Windows Subsystem for Linux to build static websites eventually to be hosted on GitHub.

24 May 2020 - fubar - Sreekar Guddeti
Let us use web development tools hosted on the Windows Subsystem for Linux to build static websites eventually to be hosted on GitHub.
My motivation to try out Jekyll is twofold. The first revolves around a possibility to revive my lost touch with GNU/Linux OS. The other is the promise of Jekyll to have programmatic control over building websites. These are interlinked. But I would like to present a perspective.
I like to work on GNU/Linux distribution. In my undergraduate studies, I mostly explored the Ubuntu operating system, which is Debian based operating system. Debian itself is a GNU/Linux distribution. However in my PhD, I bought a Dell Inspiron 7348 13 inch laptop which had Windows preinstalled. I wished for a Ubuntu version, but unfortunately it was not available in the market in my home country, India. I was not confident of flashing the hard disk and install my custom version of Ubuntu as I was new to laptops and read in the Internet that GNU/Linux OSes are not stable in laptops because the certain hardware components like networking related in a laptop still dont have open source drivers that are supported by the OEMs (Original Equipment Manufacturers). This was the story back in the year 2015. Anyways, the long story short is that I stuck to Windows OS even though I was not happy till I came know of Windows Subsystem for Linux. Using Linux in Windows as virtual machine using VirtualBox was promising but was resource heavy in terms of memory and overall feeling was of slow performance. As a result
Windows Subsystem for Linux (WSL) promised to bridge the communities of the Windows and GNU/Linux world and provide commonly used GNU/Linux tools on the Windows platform. This was an output of very smart people and hinted at the importance of open source community in driving innovation. Also surprisingly, this sent an alarm across the open source community about the impending death of open source development.. Till now most of the software development was mutually disjoint into the proprietary world and the open source world.
Earlier I used to build my website using Zim desktop wiki. Zim is a great tool. It actually helped me learned some aspects of Application Programmers Interfaces (APIs) after going through its source code. But it was not difficult to realize the limitations of such workflows as using Zim or Wordpress after reading an article by Andrej Karpathy to switch from Wordpress to Jekyll. Wordpress site is built on a database, which itself is binary and prone to security threats. In retrospection/hindsight, Zim does not have programmatic control over the variables of the site like the authors, posts, tags and titles.
My testimonial to Zim written at the forum in September of 2019.
My motivation to migrate from Zim to Jekyll actually involved a cascade of events primarily starting from a desire to version control my PhD thesis. As a result I fleeted along various tools like GitHub (for versioning content), markdown (for structuring content), Atom (for editing content) and Jekyll (for viewing content). The GCD (upside) of these tools turned out to be seamless platform (desktop/web) agnostic content-keeping. The LCM (downside) is the larger footprint compared to the much leaner Zim. Since Zim restrains itself by being a desktop wiki, I was more convinced to make the migration after reading a GitHub issue that discusses Zim lacks markdown support. After reading a post on an academic writing workflow by Chris Krycho using markdown with the support of Pandoc (for interdocument conversion), I started the migration. Jekyll is only a part of the process. Notwithstanding my perceived limitations of Zim, as a testimony, I would like to share that Zim helped me learn a lot about web tools (like wiki functioning, html, thrill of creating your own site with fivethirtyeight theme :D (I still use it for my site)), content-keeping (like interlinking notebooks), API usage (my first serious foray into reading source codes was through Zim. I managed to extend Zim’s functionality, along with some web scraping Python modules, to setup up a Mendeley like interface of many-to-many mappings between Authors, Titles and Years :D). On a philosophical note, Zim is but a bead in the process of evolution of content-keeping. It is neither the beginning nor the end. Its a long way to go where the GCD equals the LCM (the ultimate non duality) ;).
Let us get started with building Jekyll generated static sites on Windows.
Jekyll is a static site generator. It is assumed that the site we intend to create is a collection of posts. We can order the posts based on the creation date, the authors of the posts, the tags that represent the post content. The design philosophy for the site can also be materialied using other site generators like Wordpress or offline static generators like Zim desktop wiki.
In this post, we focus on the build process of the website rather than the philosophy of Jekyll. For more information on how Jekyll works, refer to the post What is Jekyll?
Jekyll is a Ruby gem based on Ruby programming language. However there is no need to know Ruby to build our site. What we need however is Ruby installed on Windows OS. Now there are two options for a Ruby installation.
I personally was thrilled with the second option. This led me for the first time to explore Windows Subsystem for Linux.
Windows Subsystem for Linux is a GNU/Linux environment directly in Windows without the overhead of running a virtual machine. This is something that baffled most of the development communities of both open source and closed source.
WSL needs Windows to run on Insider Preview mode. This allows to activate WSL as an optional feature. After activating the WSL, install a GNU/Linux distribution on Windows. I chose Ubuntu 18.04 LTS. After a successful installation of Ubuntu 18.04, you can start literally open Bash terminal on Windows.
Now install the Jekyll Ruby gem on WSL as shown below.
Though the version control is not necessary, it has its own benefits. Creation of contents is not a one time affair, and we need to incrementally revise our content and maybe revert back to previous versions of content. In such circumstances versioning your content saves your skin.
Git for windows installation is straightforware. However knowing how to use Git is not. It has steep enough learning curve, but once a working knowledge is acquired, there is no going back.
Jekyll supports gem based themes for the website, which outline the structure of the website and its styling. The structure conveys how the posts are stored, how the authors of the posts hyperlinked to the posts, if there are any tags to the posts that can be sieved. However, we will follow the basic route and not rely on these theme. Instead let us setup a website from scratch. The folder structure of our website will look something like this.
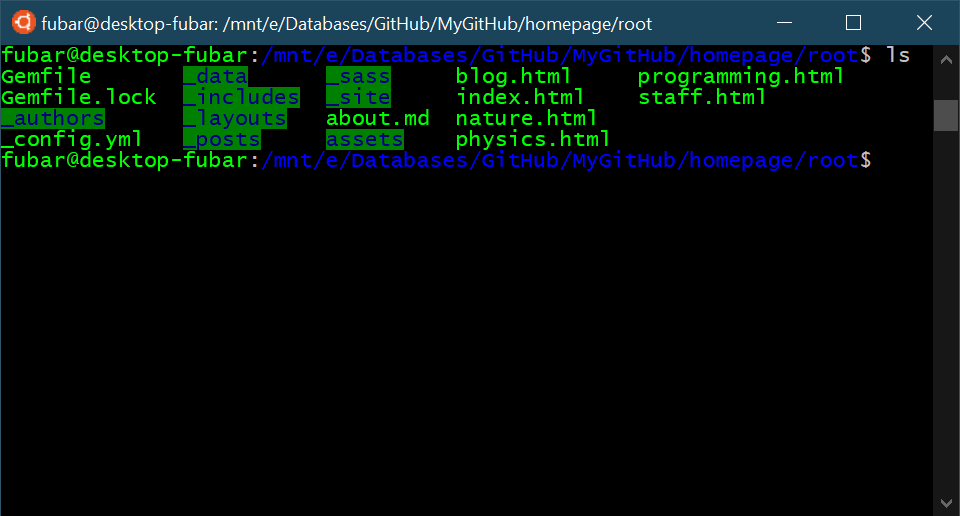
The core components of the website are
<root> directory which holds the source code of the site. It can have any name..config.yml A YAML file that describes how the site is configured.Gemfile that lists the Ruby dependencies of the sites.Gemfile.lock A file that freezes the version changes of dependencies so that site can be constructed across platforms and system. This is similar to a requirements.txt file used during installing a python virtual environment.A build of site is an iterative process where each iteration involves four steps,
Let us discuss these steps below.
Go to the _posts directory and create a post. Jekyll posts support markdown. A valid format for the name of the post is
Year-Month-Date-name-of-post.md
2020-05-24-how-to-build-jekyll.md
After creating the content, to check how the site would appear if deployed on production servers, we can serve the site from a local server provided by Jekyll by
.../root$bundle exec jekyll serve
The site can then be accessed at http:localhost:4000. We can keeping modifying content even when the site is running. This is an awesome feature of Jekyll and is called incremental-build.
Once you are satisfied with how the site is deployed, stop the server. Now it is a good idea to version control the site using Git. If not already initialized, initialize the git repository in the directory where the root of the site resides. We have named the root of the directory as root itself.
<parent-directory-of-site's-root>$git init
Now generate the site for production using
JEKYLL=bundle exec jekyll build
This generates a sites directory in the root directory.
There are two workflows for building the site. The first involves simple configuration but many steps during deployment. The second involves lengthy configuration but simple click deployment. Common to both the posts are creating the post and checking the site on local server. What differs is how we version control the site and its source code and how we deploy the production ready site.
Basically in the simple workflow we separate the source code of the site from the site ready for production. To accomplish, we have two gitted repositories; one for the source and the other for the deployment
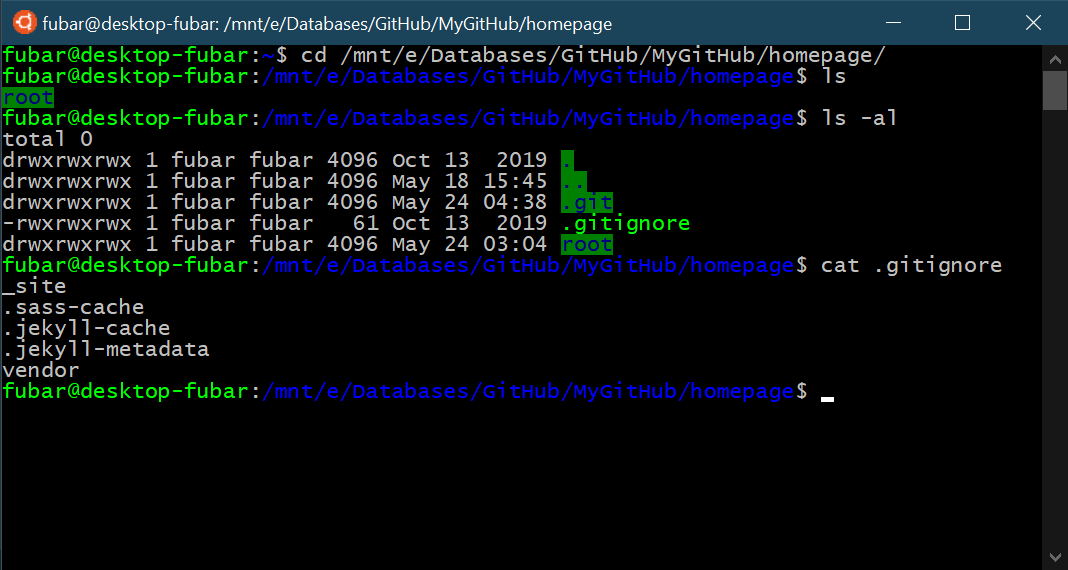
If not already initialized, initialized a git repository in the directory which contains the root of the site’s source code. Also create a .gitignore file to exclude the built site at _site and other cache files of Jekyll as shown below
<parent-directory-of-site's-root>$git init
Now after an incremental creation of site and cross checking in the local server, when it is time to version control the site, commit to the repository by
$git commit -m "my nth post"
Now build the site using
$bundle exec jekyll build
This will generate a _site directory which holds the site files. These need to copied with delta copy algorithm to the Server side repository.
I want to push my site files to the GitHub using the GitHub’s website hosting service. Basically a repository named <GitHubusername>.github.io can host your website automatically. This is possible due to the GitHub pages website hosting service. My username on GitHub is baalkikhaal. Once I create a repository named baalkikhaal.github.io in my profile I will clone it on my local computer using
<server-side-git-repository-parent-directory>$git clone https://github.com/Baalkikhaal/Baalkikhaal.github.io.git
This creates a local copy of the server side repository at ...Sites/Baalkikhaal.github.io directory. This directory contains only the site files which are there at production server on GitHub site. Additionally it has git files like .git directory. In this way I have copy of the server side of the site.
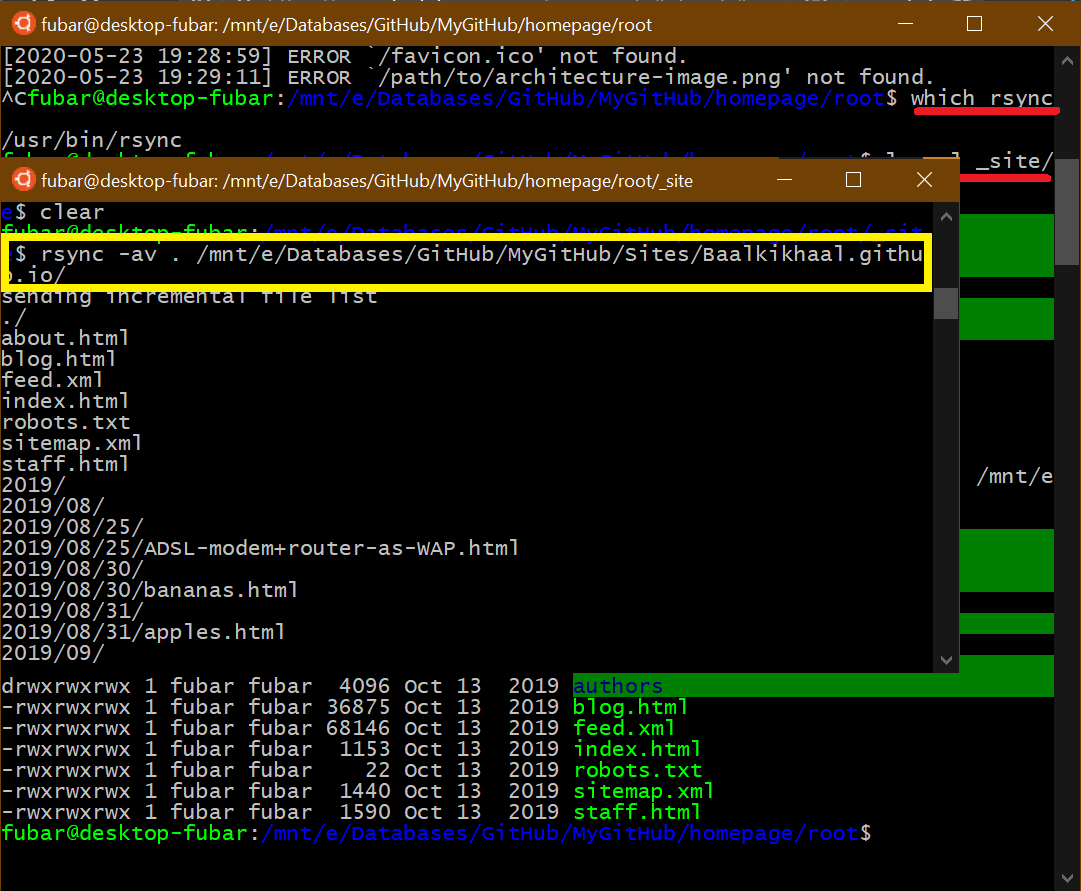
Since I have created an incremental content in the source side repository and built the site also there will be additional files in the source side in comparison to server side as shown below by listing the contents of .../homepage/root/_site source side directory and .../Sites/Baalkikhaal.github.io using ls -al command as shown below.
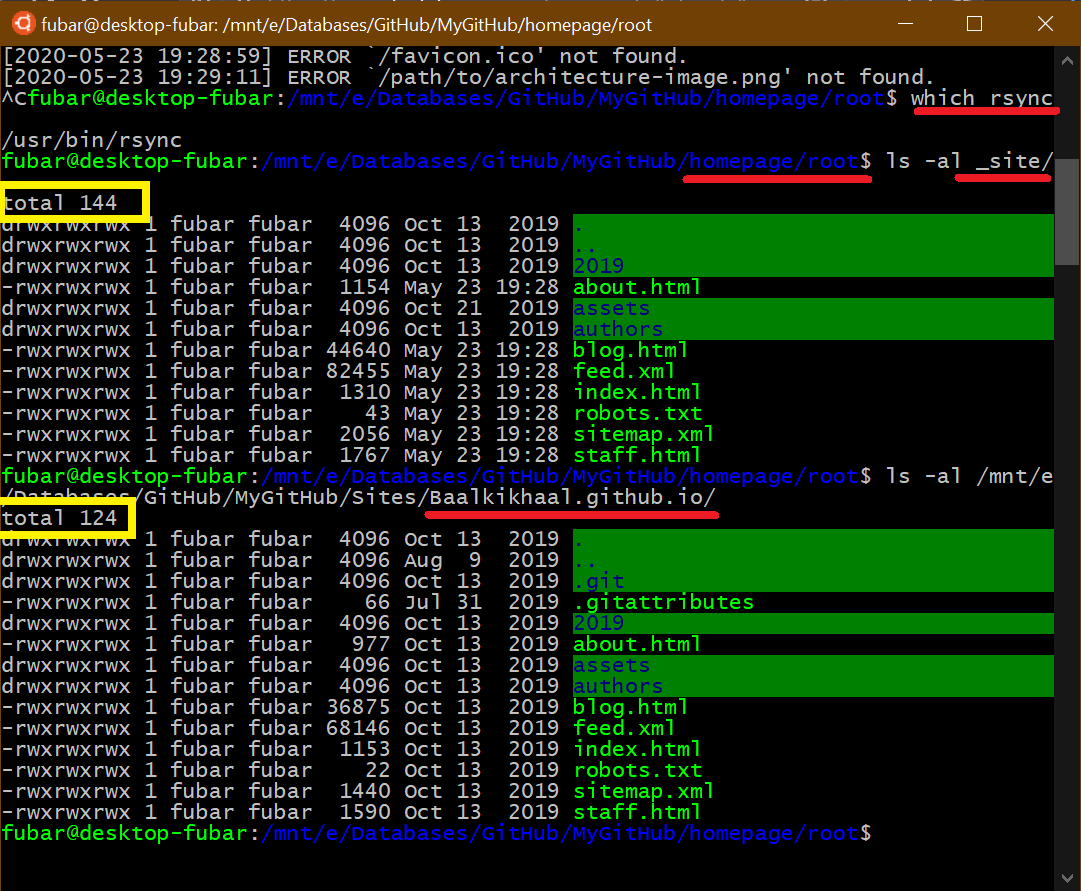
All I have to do is transfer my site files here from the source side. For this I will delta copy my site files from source side using rsync command. rsync uses delta-copy algorithm and preserves the flags of the file like creation date and modification date. In this way, unmodified files in the site will not be recopied thereby avoiding unnecessary overhead during incremental commits
$rsync -av dir1/ dir2
this command copies the contents of dir1 excluding the dir1 perse into the dir2. This is done below to transfer the contents of _site from .../homepage/root/_site/ to .../Sites/Baalkikhaal.github.io/. Specifically the command used is shown below
Now that the files are added to the server side repository, it is time to commit the files to the git. After doing the commit similar to that done in source side repository. It is time to push the commit to the production server hosted at GitHub using
$git push origin master
The meaning of this command is explained in the Git tutorial.
Refer GitHub pages for setting up this workflow. It involves tedious configuration steps, but once the site is configured, it is simple click to deploy the site for production unlike the Simple Workflow.
In the Simple Workflow, we use Github as a website hosting service only. A website hosting service provides
web security service. This is one of the most important aspects of internet communication. Disruption to the serving of content is attempted with malicious intent by many elements either human or bots. Disruption can be in the form of
It is the duty of the hosting service to secure the content. When we use Jekyll to create our static content, we programmatically create the linked site structure in the form of posts and pages. As Jekyll supports mardown, creating posts in markdown is more easier than writing in raw html by utilizing the markdown’s easily readable markup format. The posts and pages are written in markdown. In addition, the assets of the site like multimedia (images, audio, video files), javascript (for animations and event driven responses) and css (for styling the content) are handled as separate containers are easily linked to sites using Markdown’s hyper reference syntax. Further in combination with Jekyll’s Liquid template language, we can load load dynamic content on your site.. Once we are ready with our content, we need to build the site. This means we turn the crank of Jekyll and it generates inter linked html content ready to be hosted.
In the simple workflow, the step of building content is done offline by the user and once h/she is satisfied with how the content is served by testing on a local server, the built content is pushed onto the machine providing the web hosting service. In general the machine can be provided by any service provider. It is not required that the site built from jekyll needs to served on Github repository. However we choose to serve it on a Github repository as it provides free hosting service. As shown earlier, by pushing the content on the baalkikhaal.github.io repository, the html is served at https://baalkikhaal.github.io. In the backend, it is the Github Pages webhosting service that is responsible for serving the site.
Github Pages is a website hosting service that has two roles
The first role is utilized in the Simple Workflow. The second role can be utilized to outsource the job of building the jekyll site to the Github Pages so that there is no need to build the site offline. Further convenience is gained by maintaining a local git of the site repository. After editing the site, a simple push to the origin ensures the changes are live. If the git jargon is confusing, please check out git jargon. This makes the building sites easy and is reflected in the motto of Github Pages
Just edit, push, and your changes are live.