 A tutorial on how to set up a TP-LINK ADSL router as a WiFi Access Point (WAP). It also gives description on how the IP addresses are assigned across networks.

25 Aug 2019 - fubar - Sreekar Guddeti
A tutorial on how to set up a TP-LINK ADSL router as a WiFi Access Point (WAP). It also gives description on how the IP addresses are assigned across networks.
I have a TP-Link ADSL modem + router (M+R) with me. It can be used in the following modes:
I want to use the (M+R) as a switch to connect my desktop computer to the LAN. Also I want to use the (M+R) as a WiFi Access Point (WAP) as the iiscwlan WiFi signal at my office desk is feeble. I want to take the ethernet port as input to the (M+R).
Following are the steps to setup the (M+R) as a switch:
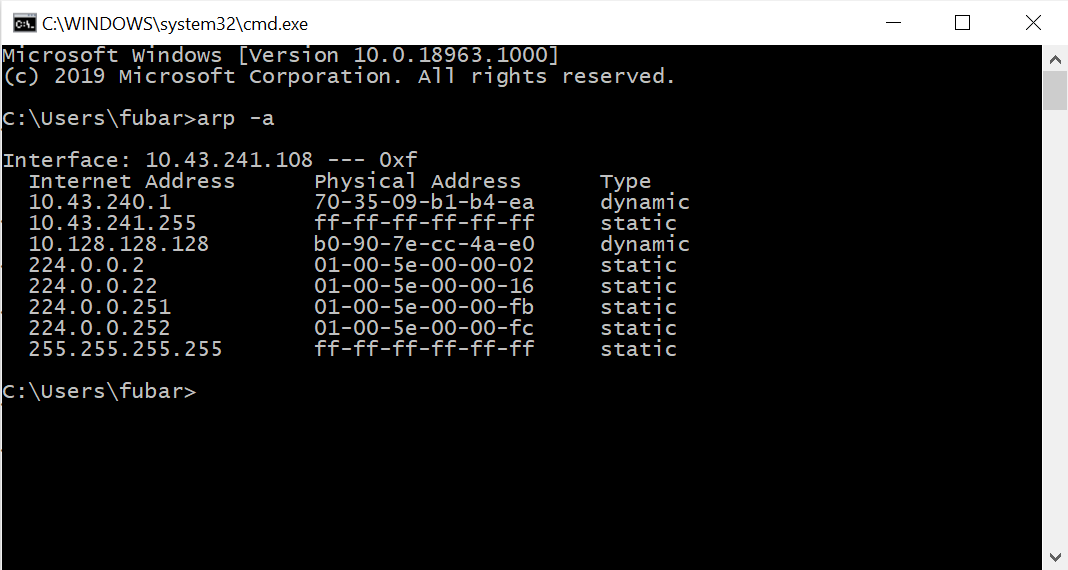
Currently I am connected to the iiscwlan WiFi on my laptop. This is confirmed by arp command; Address Resolution Protocol. The current IP address is 10.43.241.108 which is dynamically allocated by the router at 10.43.240.1.
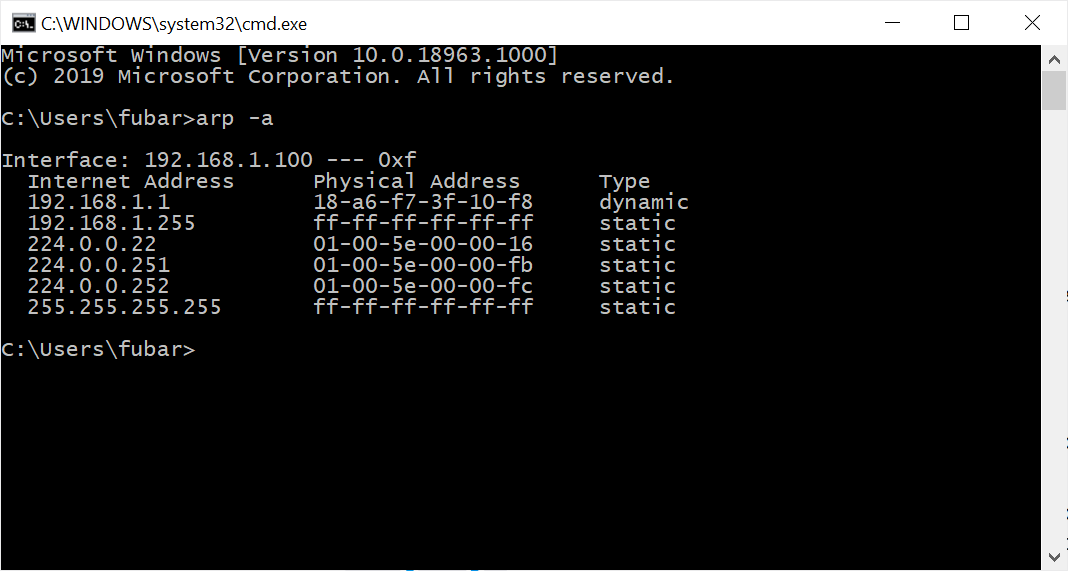
Disconnect from iiscwlan. Switch on the (M+R) and reset to factory defaults. Connect to the TP-LINK WiFi from the laptop. After successful connection, the IP address is set to 192.168.1.100. The DHCP server in the (M+R) automatically allocates the above IP to the laptop. The router is at 192.168.1.1.
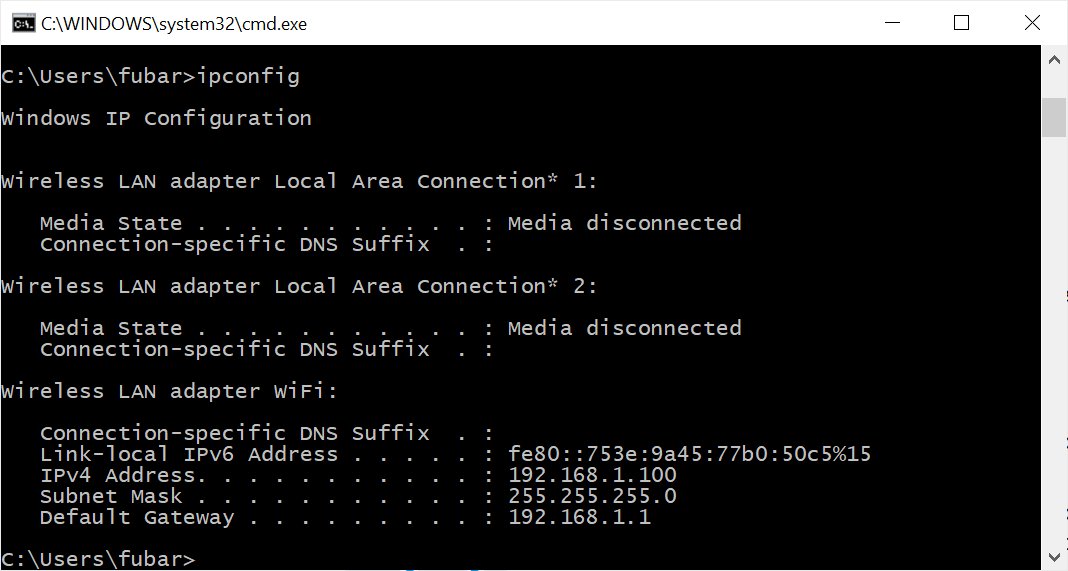
Similar information related to the address can be accessed by ipconfig program. This information is network interface centric.
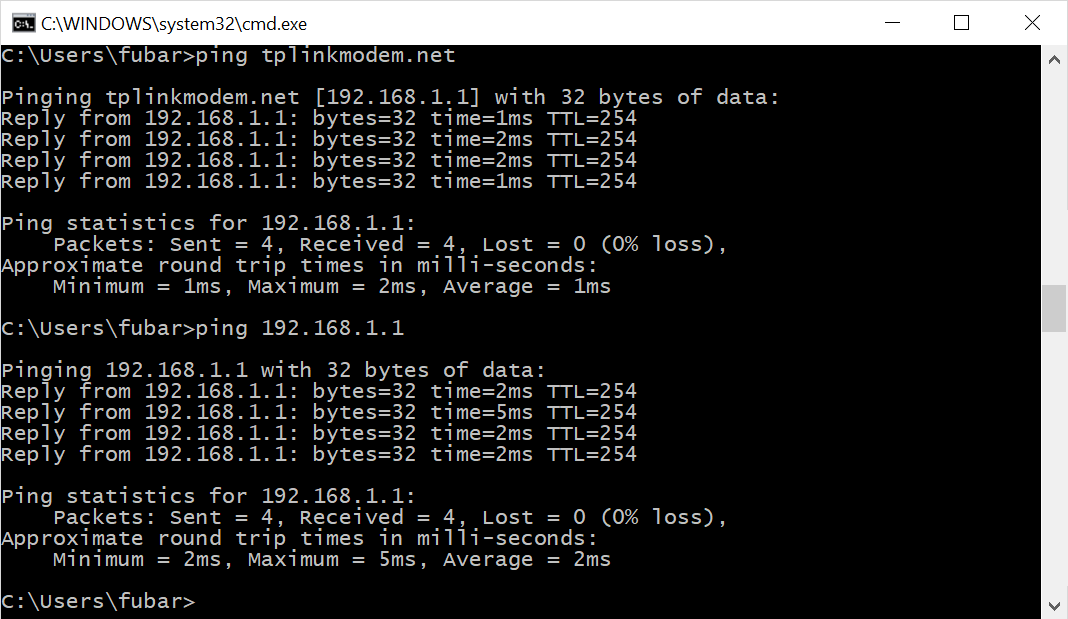
One can check the connection is successful by pinging the server by using either names at 192.168.1.1 IP address or http://tplinkmodem.net.
Now access the (M+R) settings page using Firefox by fetching the page at 192.168.1.1 IP address or http://tplinkmodem.net.
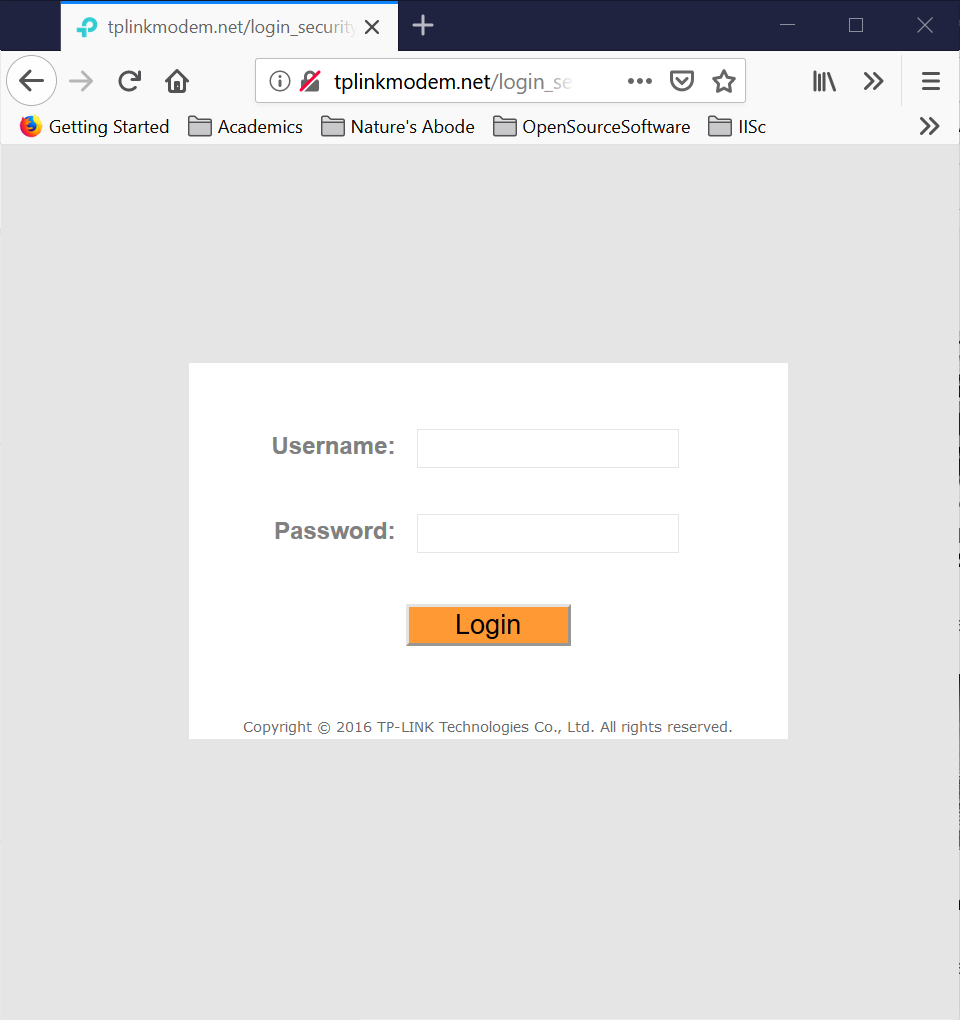
Using default admin:admin login credentials log into the settings page.
Since we want to setup (M+R) as a switch, we do not tamper with the
internettab.
On the
LANtab, set the IP address to the ethernet port address designated by the department sysad.
Set the 24 bit subnet mask.
Most importantly, disable the DHCP server. We only want to set the (M+R) as a switch.
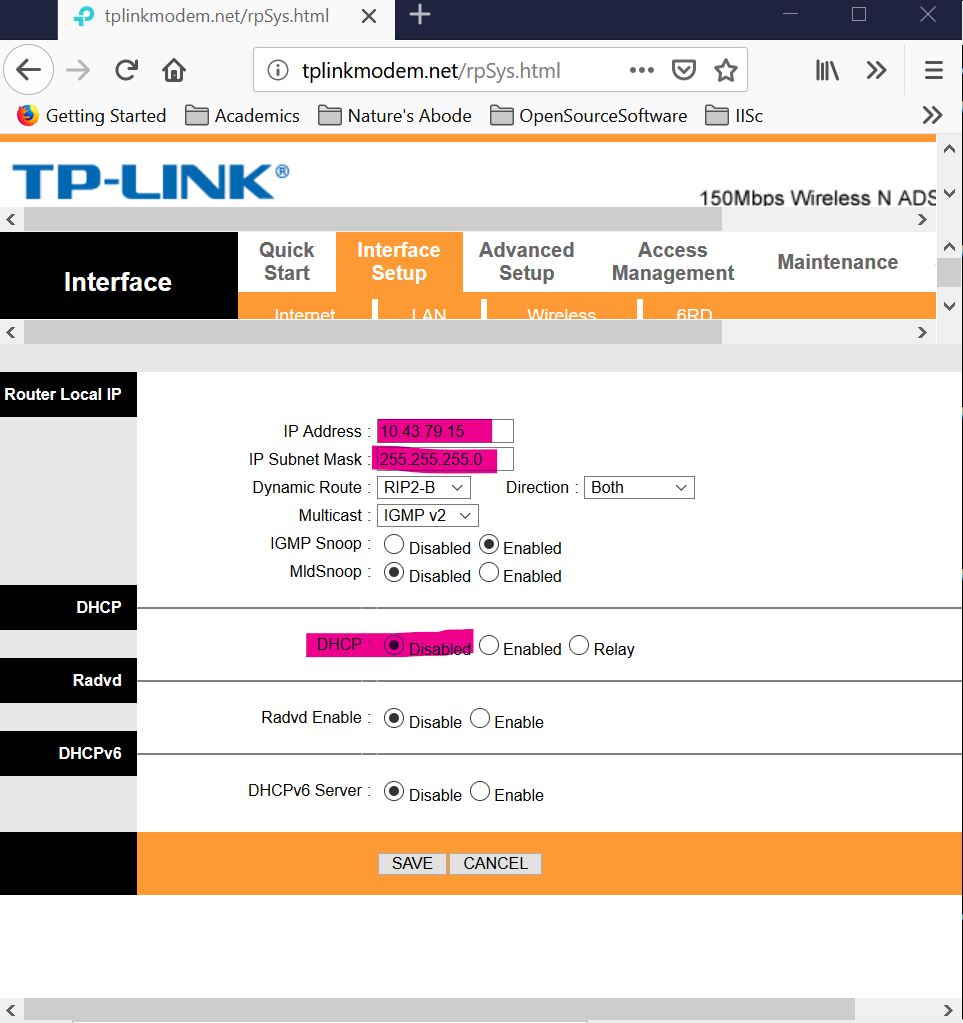
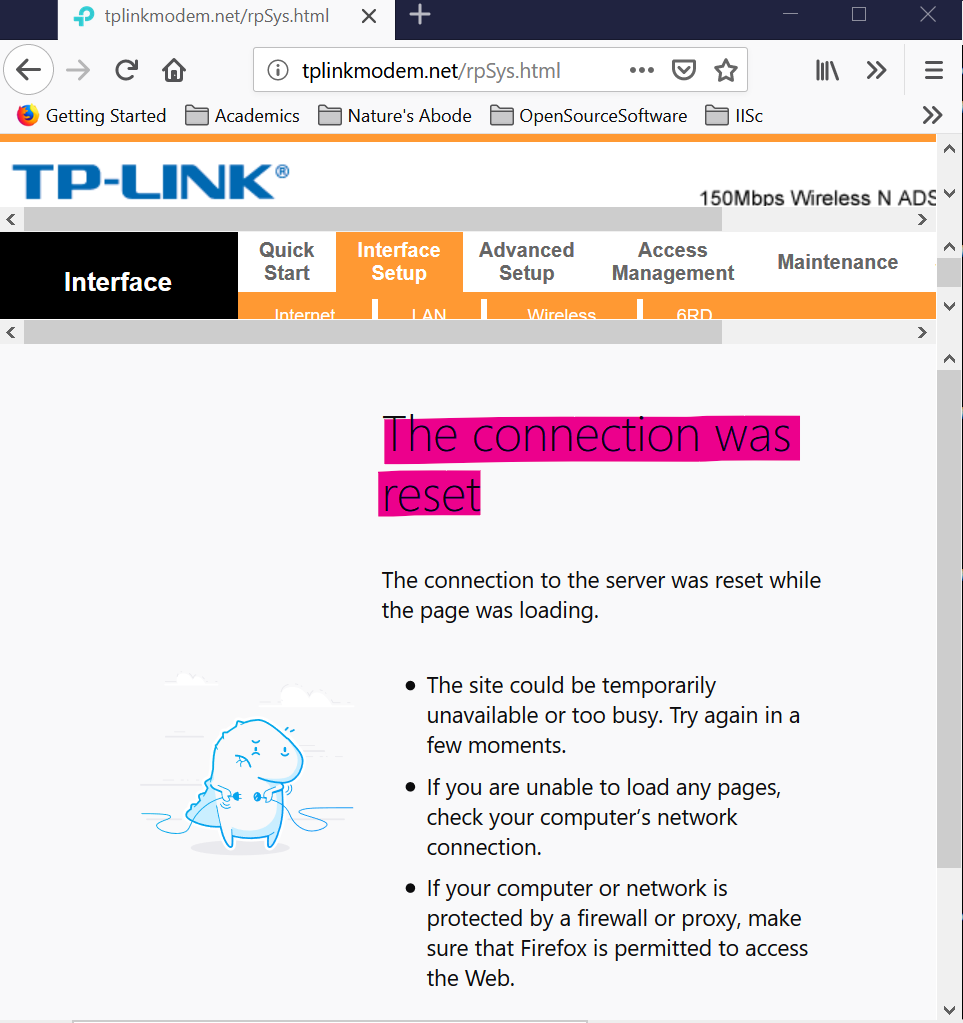
Now save the settings, this will reassign a new IP address 10.43.79.15 to the (M+R). This is shown as a The connection was reset error As a result, there will not be a connection to the (M+R) using the previous 192.168.1.1 IP address.
Till now we have not connected any cables to the router from either the ethernet port or the desktop.
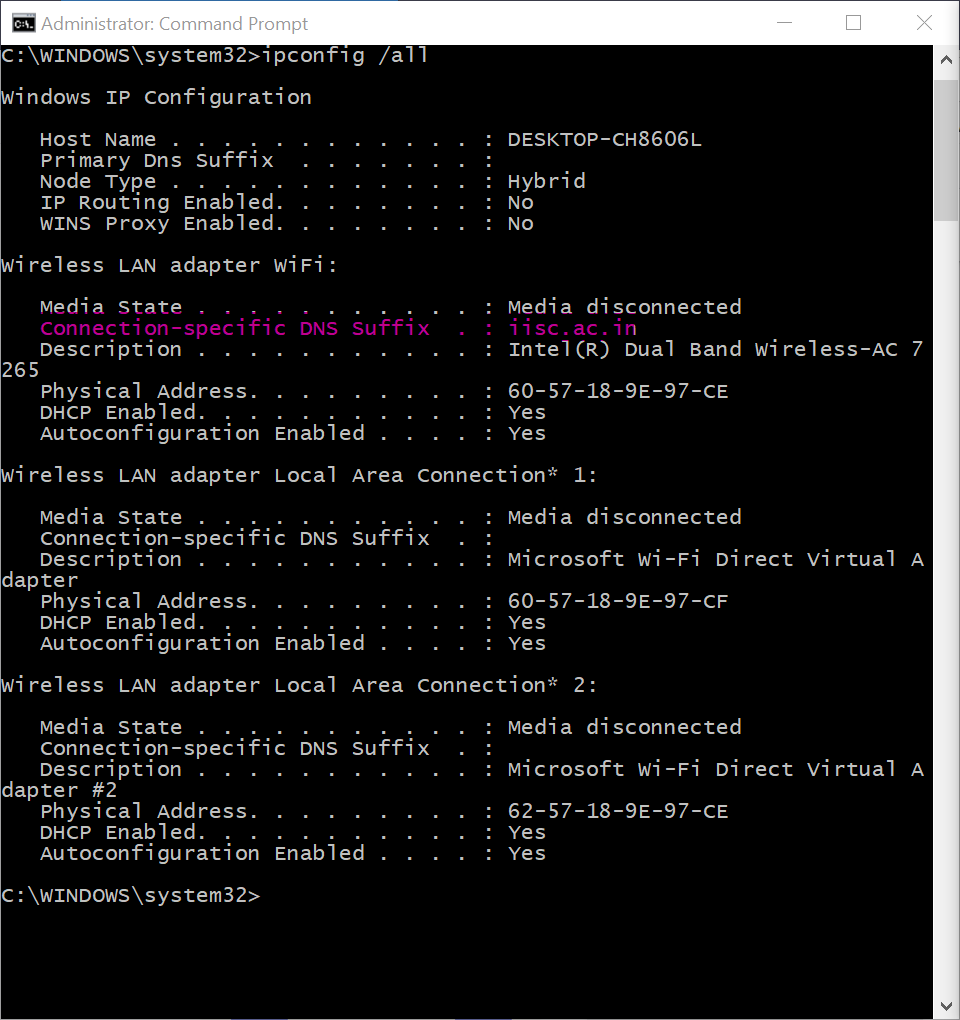
Now try to connect to the internet by plugging in the ethernet cable from the ethernet port to one of the four LAN ports on the router and pinging the internet from the laptop. This will not connect the connect to the internet. That is because we have only set the IP address of the router. When the WiFi adaptor of the laptop tries to connect to the WAP, it needs an IP address. However the router cannot assign an IP to the adaptor as the DHCP is disabled. This is reflected in the ipconfig /all output. The info still points to the iiscwlan connection. We need to reconfigure the laptop’s address to point to the router’s network address.
Unplug the ethernet cable from the router.
The hardware address of the WiFi adaptor is 60-57-18-9E-97-CF.
This is when manual assignment of the IP address to the laptop’s WiFi adaptor needs to be done to match the network address of the router. This is accomplished using netsh
netsh interface ip set address name="WiFi" static 10.43.79.17 255.255.255.0 10.43.79.1
netsh interface ip set dns name="WiFi" static 10.16.25.13
netsh interface ip add dns name="WiFi" 10.16.25.15 index=2
Run the command prompt as Administrator.
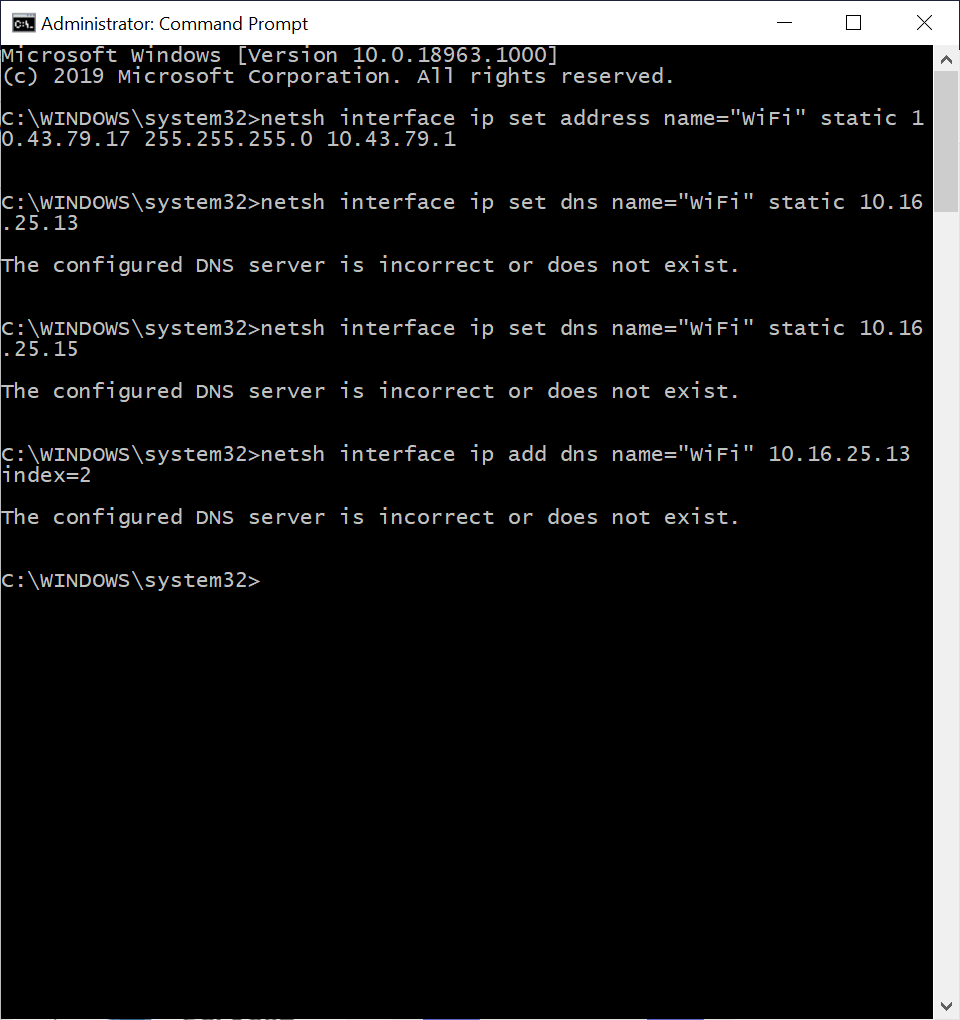
However, there is a problem with setting the DNS server addresses. DNS server serves name resolution service to the client. This is because the (M+R) is not connected to the ethernet port and able to locate the DNS server.
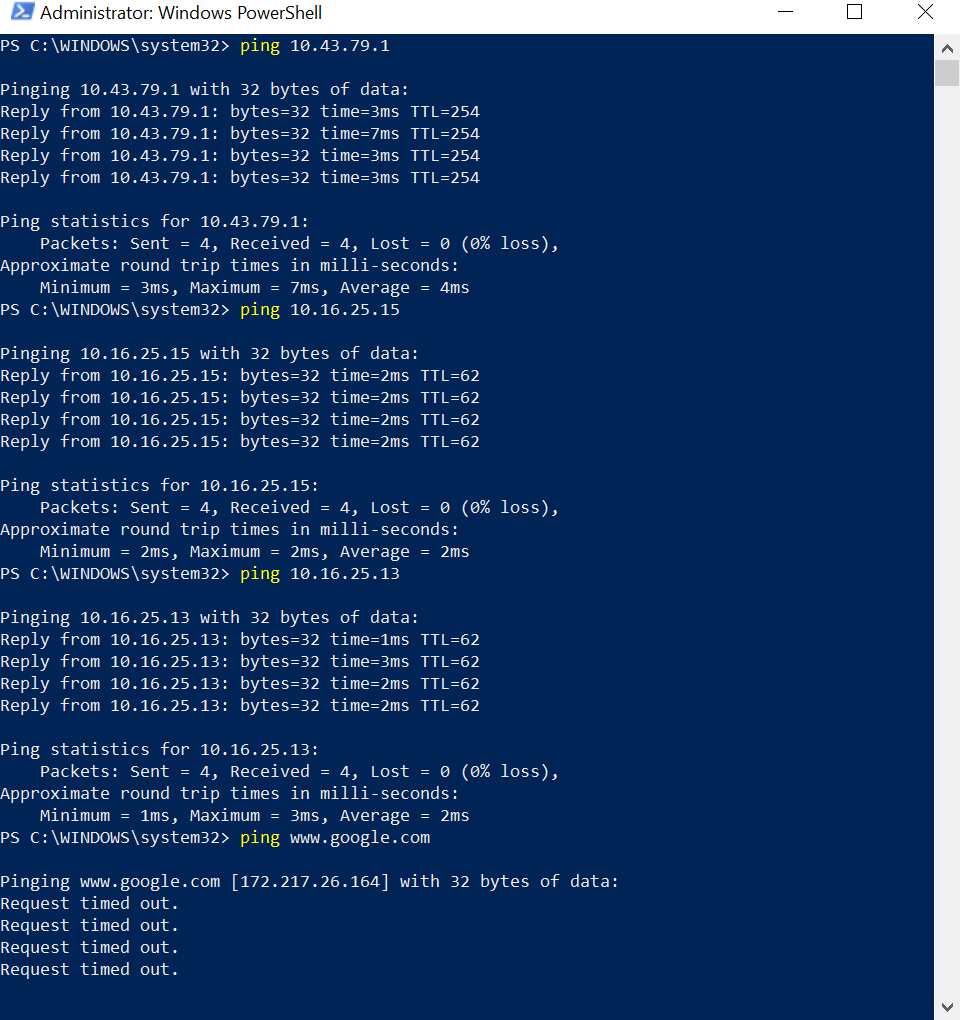
Now is the time to connect to the connnect the switch to the rest of the sub network using an ethernet cable running from the wall mounted ethernet port to one of the 4 ethernet ports of the (M+R). For this configuration, we do not have business with the modem port.
Repeating the above netsh commands will do the trick. However let us try using powershell to set the configuration.
Using powershell, we can set the static configuration.
Get-NetIPConfiguration
Note the InterfaceIndex IP addresses IP defaultGateway DNS server
Net-NetIPAddress -InterfaceIndex 4 -IPAddress 10.43.79.17 -PrefixLength 24 -defaultGateway 10.43.79.1
Set-DnsClientServerAddress -InterfaceIndex 4 -ServerAddresses 10.16.25.13, 10.16.25.15
Run the powershell as Administrator
You can see that you are able to connect to the router 10.43.79.1 as well as the DNS servers 10.16.25.15, 10.16.25.13
Now the configuration is almost done. We need to change the SSID of the WiFi interface to something more relatable. Access the settings page and change the SSID name and password. Thats it!
If needed perform the same thing with the desktop computer. Connect a cable to the Set statically the IP address.
The router comes with default SSID (Service Set Identifier) name and password for its WAP interface. However if needed, these can be reconfigured by accessing the router’s settings page and changing these parameters in the Wireless tab of the Interface Setup tab. I have set SSID as wololo with password as *********.
It is convenient to automate certain aspects of the network configuration like setting the static IP address of the laptop’s WiFi adaptor. This is discussed in the post on Python scripts to set IP address